Big Harley-Davidson motorcycles are tough on starter motors and starter system mechanical components.
Not only are the engines large, but the engines use a single pin crank with a narrow V-angle, the stroke is long and the engine’s rotating components are very heavy. Additionally, the starter motor must overcome the extra weight and drag of the clutch and primary drive components to deliver starting power to the engine.
High compression pistons and aggressive cams can make things even harder on the starting system. The starter system mechanical components can fail under such a heavy workload.
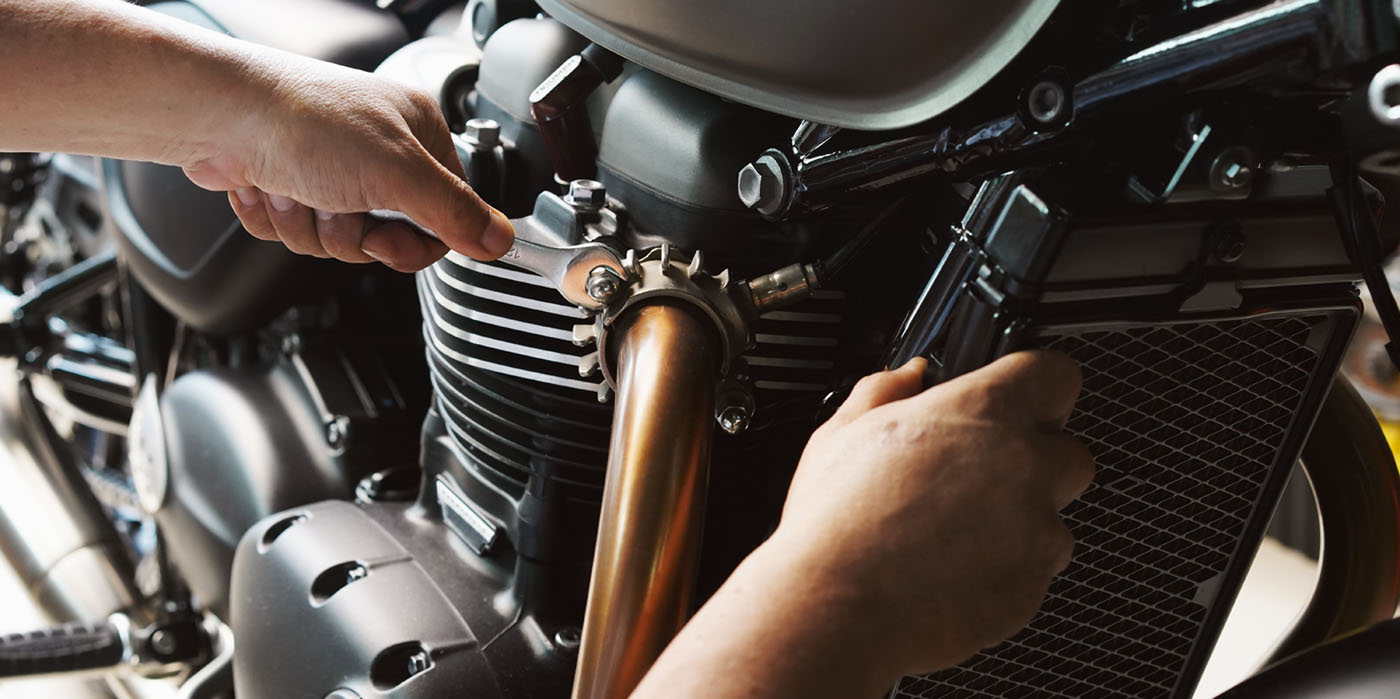
One important piece of this system is the jackshaft assembly. The jackshaft connects the starter motor to the starter driven gear on the outside of the clutch basket.
This article uses 1998 Road King as an example, but a similar set up is used on 1990 and newer big bikes.
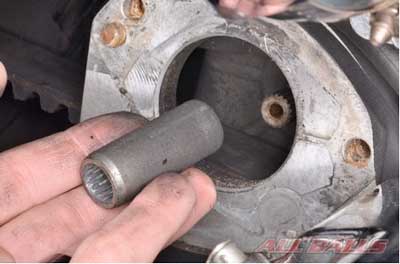
coupling from the primary case.
1. Remove the starter motor and small diameter coupling from the outside of the primary case. On installation, wait to install the starter motor and small diameter coupling until the jackshaft is in place. The small diameter coupling has a snap ring on the inside. This snap ring should sit on the jackshaft side of the small diameter coupling.
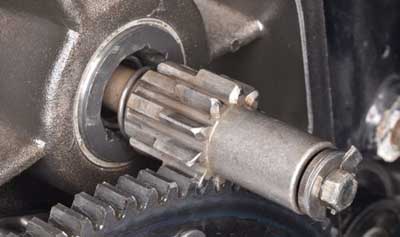
2. Bend the tab on the lock washer. Extend the pinion gear so it can be held by the clutch driven gear and loosen the jackshaft bolt. Wrap the pinion gear with a rag and hold it with pliers if needed to keep it from turning when the bolt is loosened or tightened.
3. Remove the jackshaft bolt and washers. Note the position of the lock washer for assembly. On installation, fit the inner tab of the outer lock washer into the inner lock washer slot, and bend the outer tab of the outer lock washer against the tightened bolt.
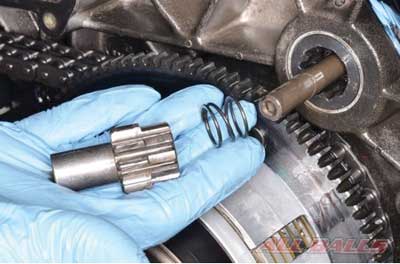
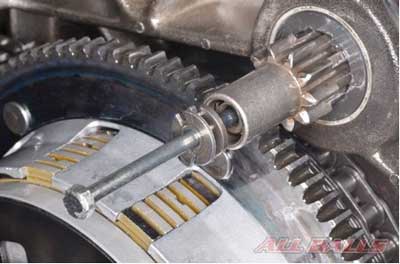
4. Remove the pinion gear and spring, and check for any damaged teeth on the starter driven gear or the clutch basket. Replace the components as necessary.
When installing the pinion gear onto the shaft make sure its key aligns with the jackshaft keyway. Fit the lower teeth of the pinion gear into the grooves in the large diameter coupling.
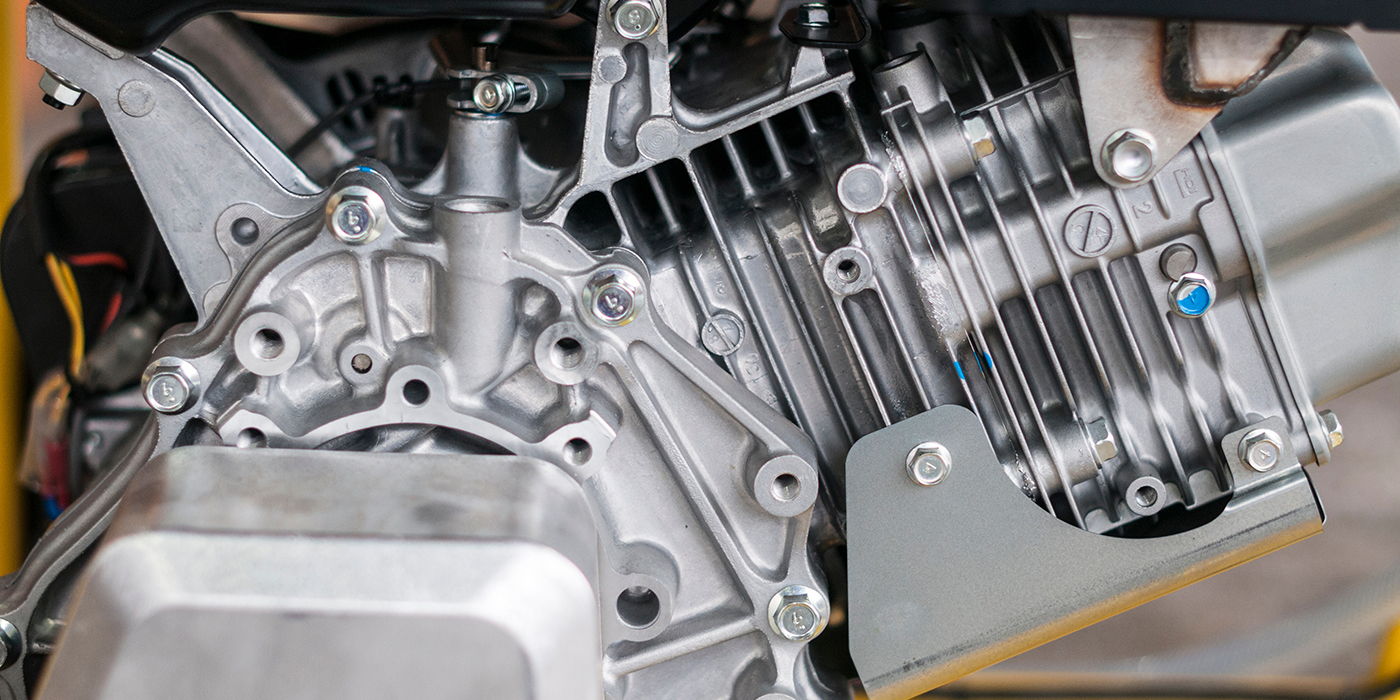
The clutch must be removed to fully access the jackshaft. Follow the OEM instructions for removing and installing the clutch and primary drive as an assembly.
Note: On some models the clutch hub main shaft nut has reverse or left hand threads.
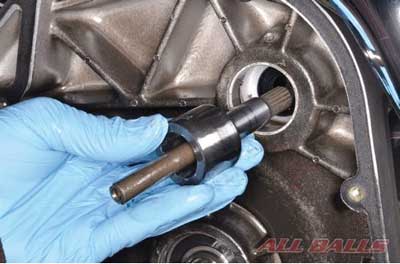
5. Slide out the large diameter coupling and jackshaft. Check the jackshaft and large diameter coupling for damage and wear. Inspect the coupling and pinion gear bushings in the primary case and cover for wear and damage. The coupling should have a snap ring inside. Note the position of the coupling for installation.
On installation, fit the jackshaft into the large diameter coupling so that the deeper side of the large diameter coupling will face towards the spring.
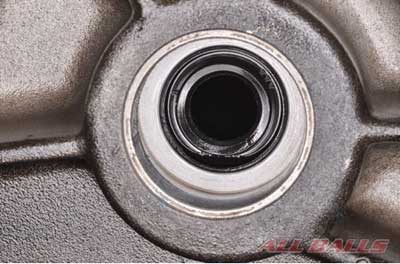
6. Replace the jackshaft oil seal with a new item if the jackshaft is removed. Apply grease to the lips of the new seal and make sure it is fully seated.
If the motorcycle has broken a jackshaft or related starting component it may be necessary to take some steps to make sure this doesn’t happen again. Aftermarket companies such as All Balls Racing make jackshaft upgrade kits that come with its starter motors. The All Balls jackshaft is larger in diameter and uses less additional components.
Also, it will be easier on the starter system by positioning the crankshaft so the pistons are past TDC before hitting the starter button. Activating the starter motor with the crankpin on the down stroke will reduce the force needed to initially turn the engine over. Position the crank by placing the transmission in gear and rolling the bike back prior to starting the motor.